Alone In The Dark – Chapter 2 Boiler Plate Puzzle Guide
Late into Chapter 2 of Alone in the Dark you will be tasked with solving the plate puzzle on the boiler in the basement. This comes after returning from a mysterious oil field. In order to solve this puzzle, you will first need to gather the missing pieces of the puzzle, one located beyond the broken boiler itself and the other is one of the patient’s rooms. Here’s how to solve the puzzle.
Cassandra’s Room Lock Box
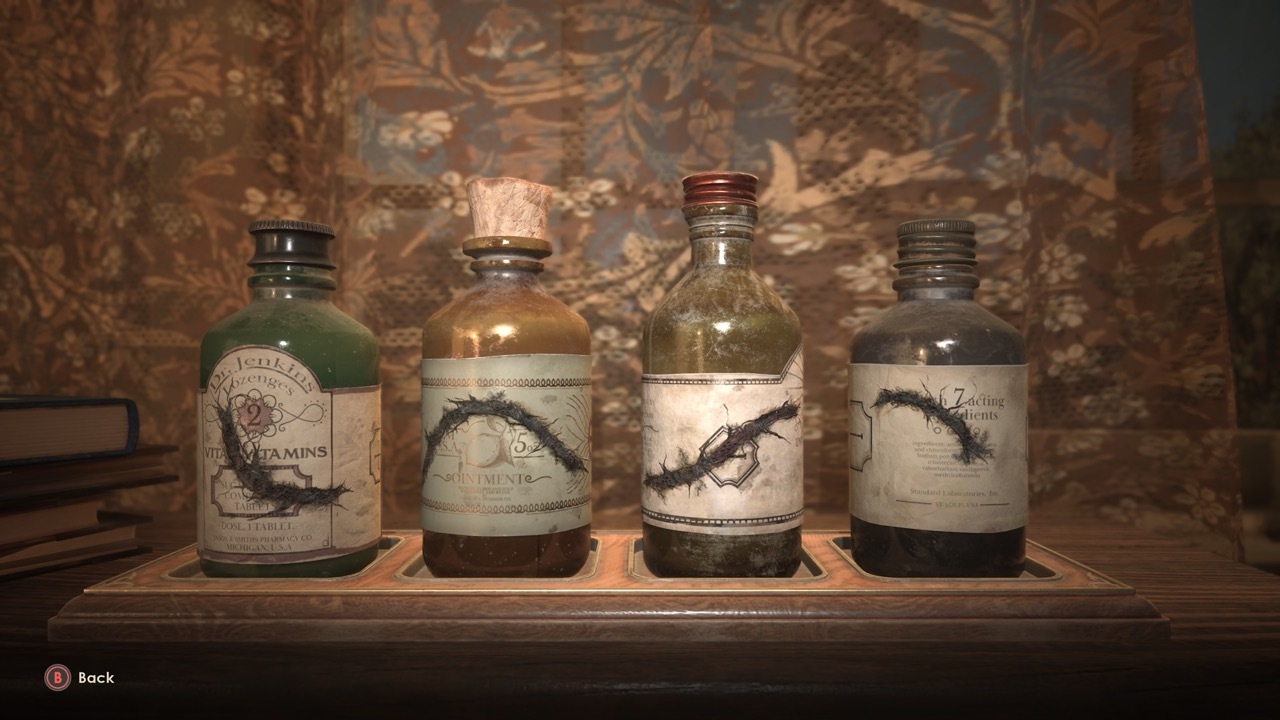
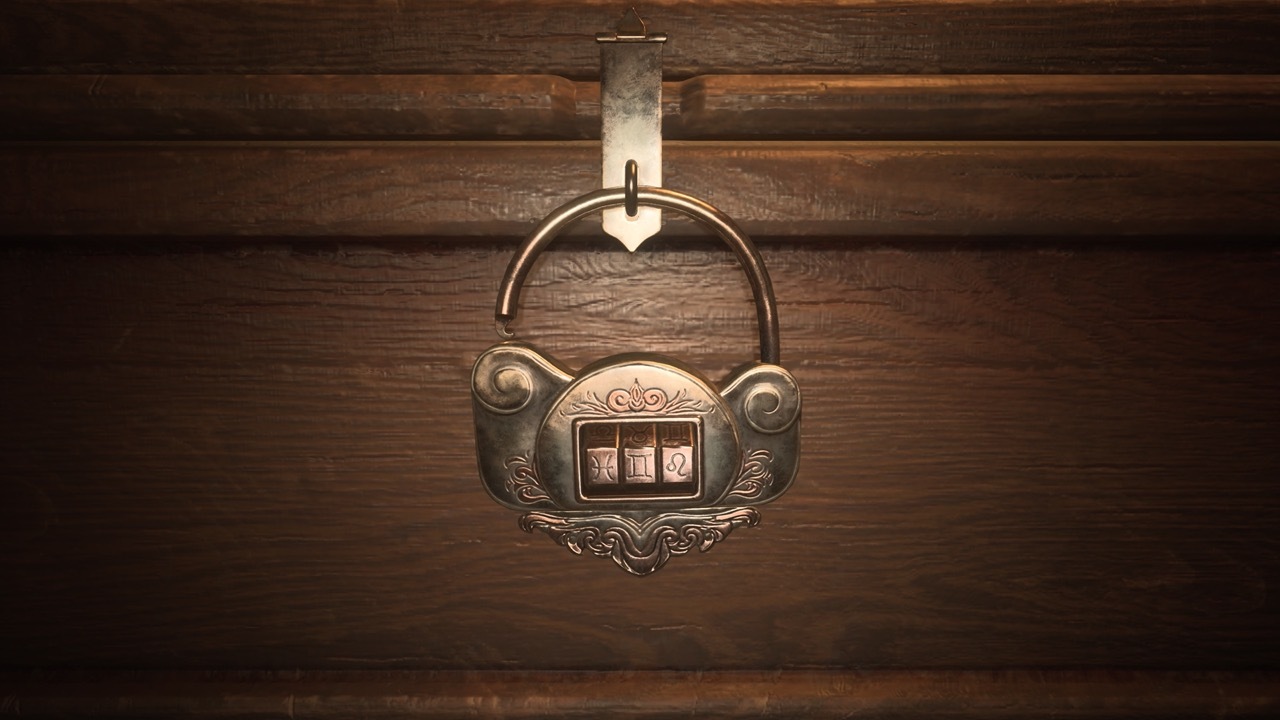
The first piece is located inside a box in Cassandra’s Room, found on the second floor adjacent to the Sitting Room. The Sitting Room key is given to you alongside the Palette Knife when you return to Decerto from the oil rig. Enter the area and head into Cassandra’s Room and you will find a locked box with another combo lock showing astrology signs. There is also a small puzzle where you can order four medicine bottles, but two are missing. One is in that same room on the desk, with the other locked in a medicine box in Lottie’s Room. There is a note in here stating that the key can be found in the Grand Parlor.
If you want to skip the search for medicine bottles, just scroll down to the lock solution below.
Head to the second floor via the Servant’s Stairs, where you can open a door to a hallway next to the Mezzanine. Circle around to the staircase on the north side and head down to the Grand Parlor. On the piano in the center of the room is the key to the Medicine Box. Take the key and head to Lottie’s Room to get the second medicine bottle.
Take that back to Cassandra’s Room and solve the row of medicine bottles by rotating placing them so the rot makes one continuous line, as shown in the image above. This reveals the numbers 2, 5, 7, which translates to Pisces, Gemini, Leo on the astrology wheel note. Put that combination in, as shown below.
Boiler Room Plate Piece
Next up is the piece located in the Boiler Room, which you will need to disable the broken boiler to reach. A note found in the boiler room earlier in the game tells you that the valve can be found in the Cellar, behind a locked gate. The key can be found in the Drawing Room on the first floor, which you can use the Palette Knife to access. With the key in hand head down to the Cellar and enter the locked area.
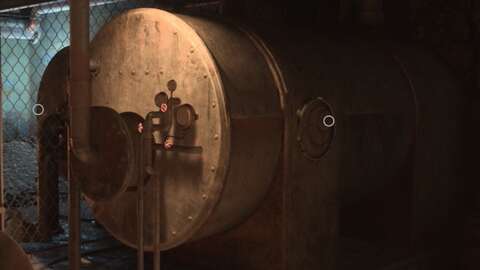
The Valve is located at the back of this area, but an electric wire blocks the path. There is a breaker box in the corner, with the missing breaker for it on the wine rack next to it. Put the breaker in the box and it will kill the power to the basement, letting you retrieve the valve. Now head back to the Boiler Room, be warned there is an enemy in the basement hallway now. Turn off the boiler and head into the back room, where the second plate piece is located.
Boiler Plate Puzzle
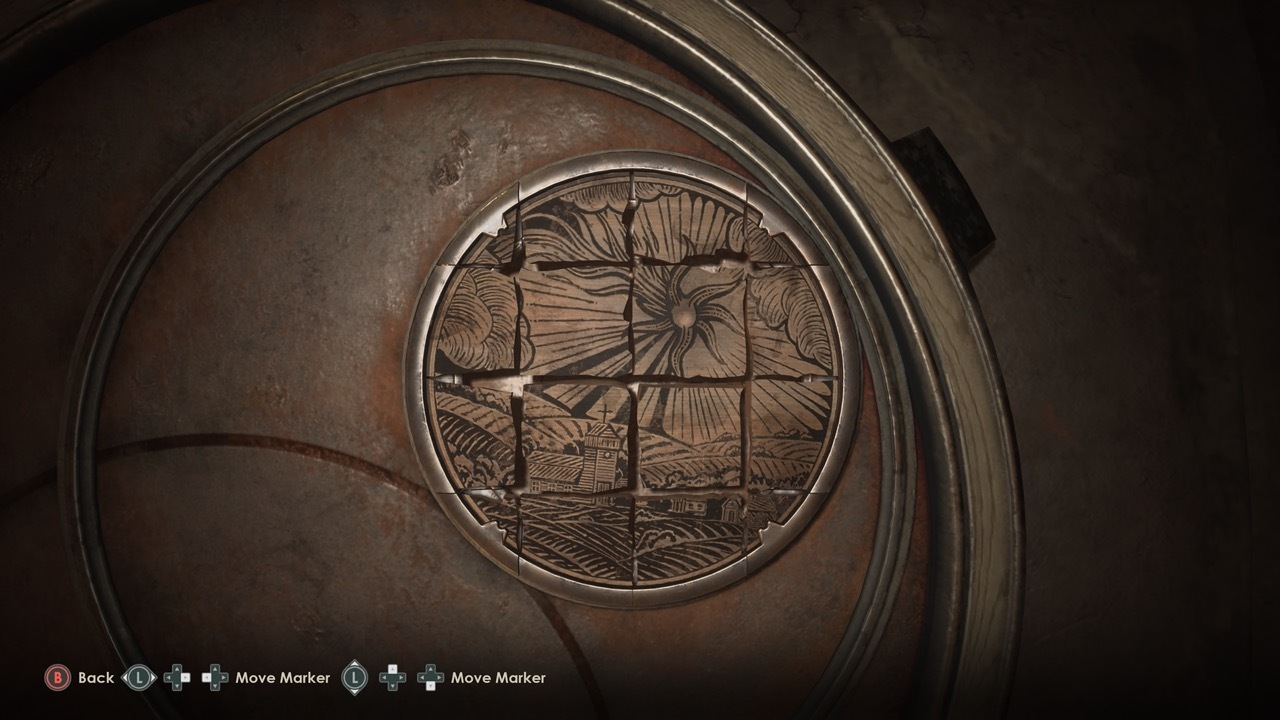
With both plate pieces retrieved, add them to the puzzle and then solve it. You need to swap pieces and rotate them to create an image of a farm and chapel, as shown above.
Once that is solved, the boiler will kick back on, showing three numbers on the pressure gauges on the side. The numbers, in order from biggest to smallest gauge are 9, 7, 5. Enter them in that order on the Talisman on the boiler, which will show you images of the Cellar. Head out of the Boiler Room back towards the Cellar to discover the new area you can now access.
Alone In The Dark – How To Open The Docks Safe In Chapter 3
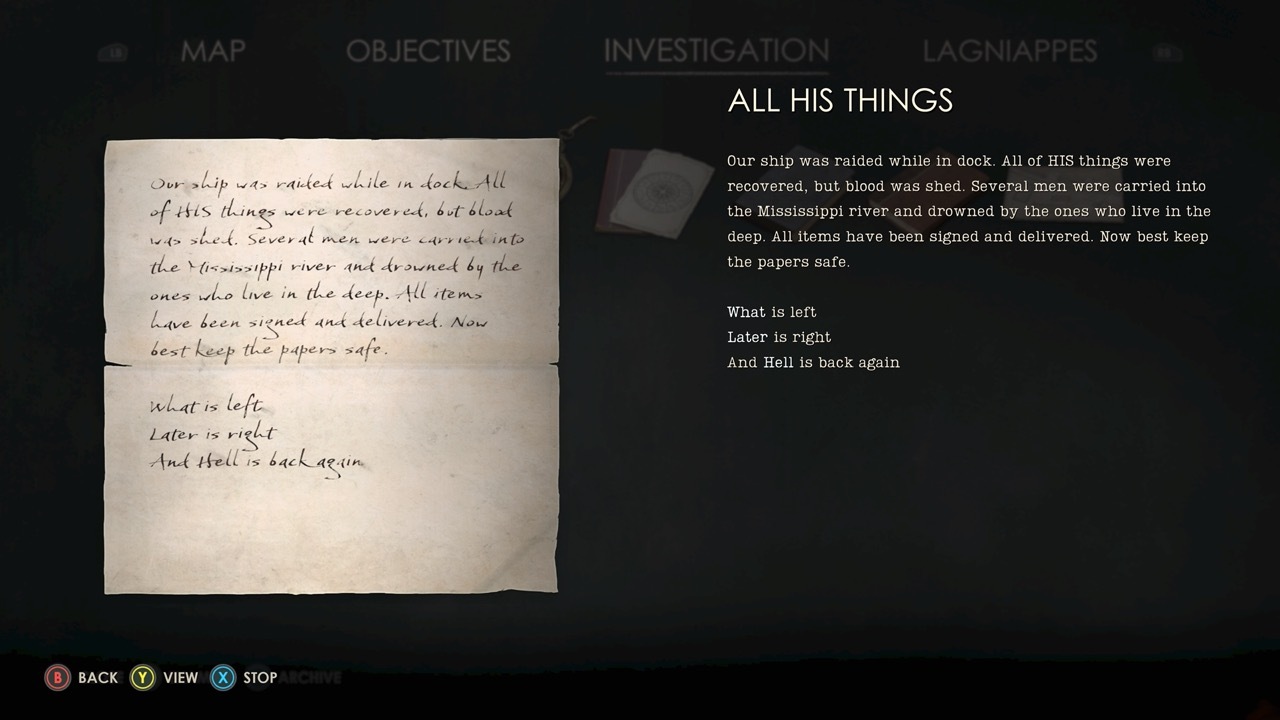
During Chapter 3 of Alone in the Dark, you will make your way to a foggy dock, where you need to find a manifest inside a warehouse. Getting into the warehouse itself isn’t too difficult, but inside you need to solve a word puzzle and open a safe containing the manifest. While the answer to this puzzle seems simple once you understand it, wrapping your head around it in the first place is a bit of a challenge.
Docks safe lock solution
The note given to you in the warehouse office talks about a man’s things, but more importantly, provides a single clue to unlock the safe in the room. The clue is “What is left, Later is right, and Hell is back again,” with those three words bolded. This note is almost nonsensical, but it’s the only piece of information you are given to open the safe. However, if you are familiar with the combination lock on the safe, it might make a little more sense.
Rotating combination locks like the one on the safe are opened by turning the dial to the correct number by turning left (counterclockwise), right (clockwise), and back left again, which is what the clue describes. Unlike other puzzles in Alone in the Dark, the cryptic words in the clue don’t relate to another clue that will provide the numbers, but instead you must simply count the number of letters in each word, making the solution 4L, 5R, 4L.
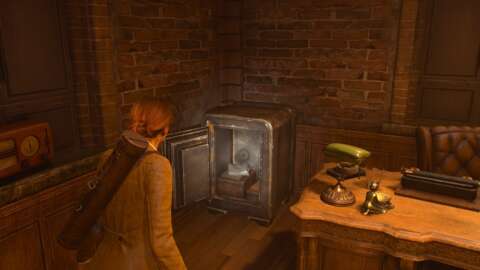
The safe doesn’t have every number listed, instead using Roman numerals on certain spots. The four and five are in the bottom right corner, just before the six at the button of the dial. Turn the dial left (counterclockwise) to the four, turn it once back to the five, and once back to the 4 to open it. Do not do a full rotation between numbers, just turn once from the 4 to the 5 and back to the 4. Once the combination has been put in correctly, the safe will open and you can collect the contents.
Alone In The Dark – Chapter 4 Blueprint Puzzle Guide
Late into Chapter 4 in Alone in the Dark you will find yourself trapped in the Medical Ward Morgue. In order to escape you will need to assemble blueprint pieces in the correct layout to match the floor plan of the ward, but you aren’t provided with any obvious clues. In order to correctly map out the floor plan, you will need to find a hidden clue that isn’t labeled as one by the game.
How to solve the Blueprint puzzle
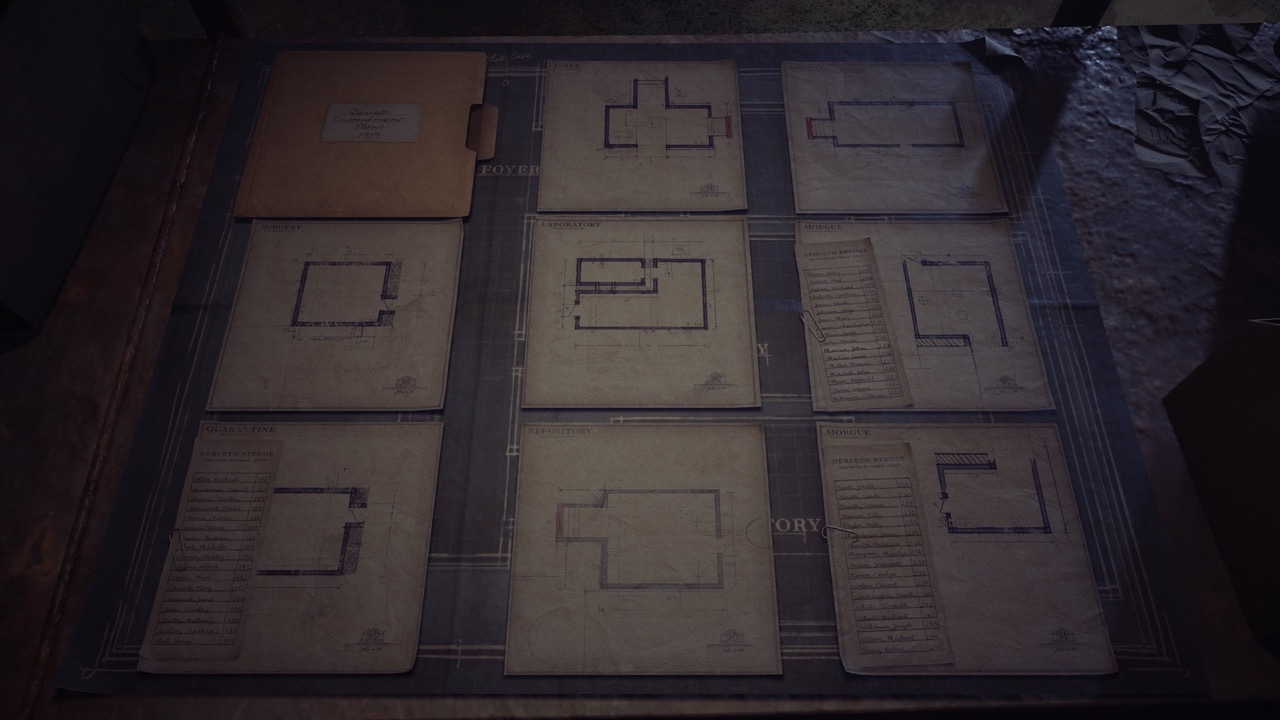
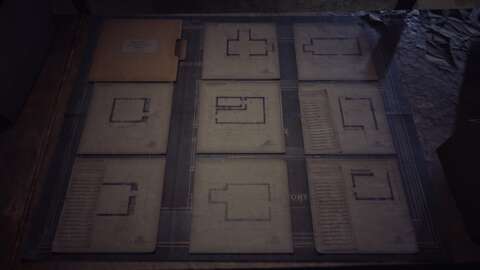
In order to solve the blueprint puzzle, you will need to find two sets of blueprint pieces in crates in the Morgue. These crates are on the various shelves in the small area and are fairly easy to find. With all of those pieces you can begin to assemble the blueprint puzzle. To place the pieces correctly, you need to match them to the floor plan underneath the pieces. Lift a piece up by selecting it and you can see each room and how it’s oriented. The correct solution looks like the image above.
The folder goes in the blank space in the top left corner, with the various rooms laid out elsewhere. Once you figure out where each room goes, the quickest way to tell if it’s rotated correctly is to get any text to set in a way that you can read it normally. Most pieces have a room name in the top corner, while some have a list of names or other information that you can use to rotate them the correct way.
Once you have placed the pieces in the correct order, a short cutscene will start signaling that you solved the puzzle. Solving this puzzle will give you the Morgue key, which allows you to leave the Morgue and explore the rest of the Medical Ward.
Alone In The Dark – Chapter 4 X-Ray Puzzle Guide
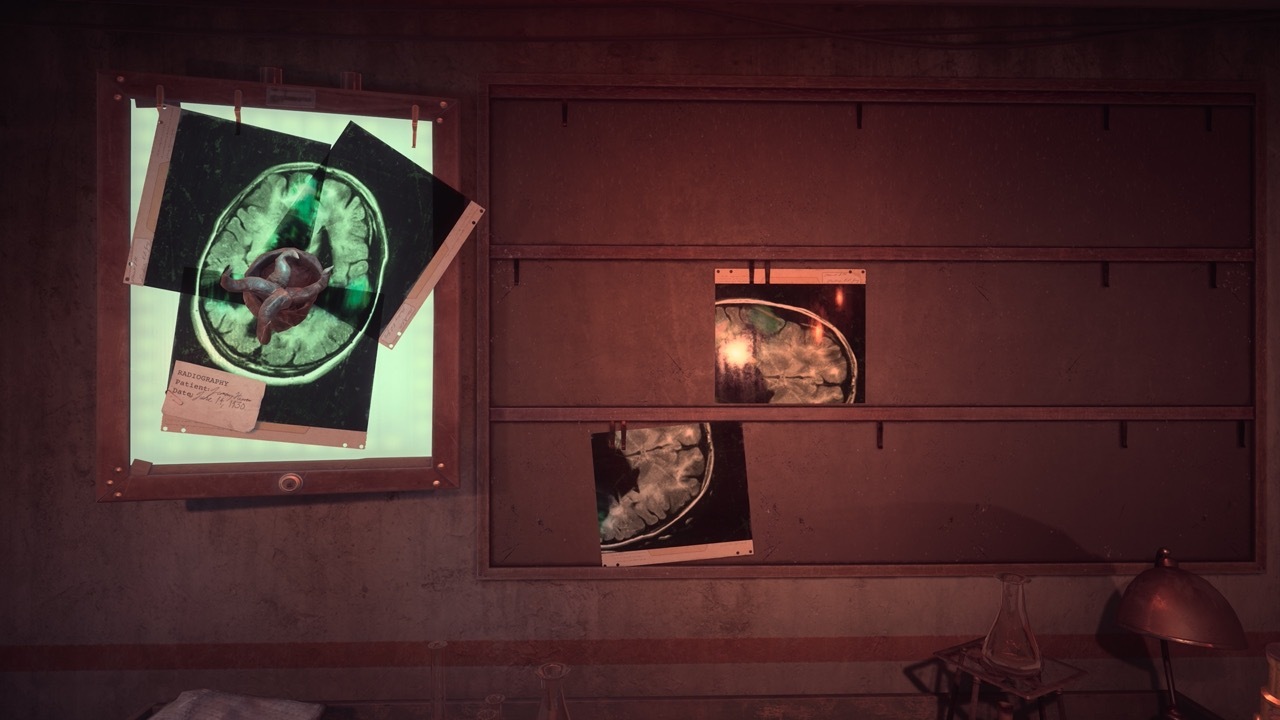
During chapter 4 of Alone in the Dark you will end up in the Medical Ward. During this time you will need to assemble an X-ray scan of someone’s brain to continue. While this type of brain scan isn’t typically an X-ray in modern medicine, the game’s post-World War 1 setting means that this is what was available at the time. In order to assemble the X-ray correctly, you will need to pick the three pieces that fit together and rotate them to complete a brain with a tumor in the center of it.
How to solve the X-Ray puzzle
Before you can start the X-Ray puzzle, you will need to gather some pieces first. Mainly, there are two X-ray pieces and two fuses you need to gather around the Medical Ward. Ignoring the Morgue where you start this section of the game, there are three rooms. Two of them are unlocked, with the third requiring a key, but the key is in the X-Ray room. Go through the rooms and grab the necessary pieces and return to the room with the X-Ray display on the wall. Next to it is the breaker box. Put the two fuses in and pull the breaker levers. Some levers will go back up when you pull them, but if you work left to right a few times all of them will get pulled down.
Once the power is back on, you can assemble the brain scan. There are five pieces, but you only need three for the solution. There is only one bottom piece, so throw that up first. After that, you need to pick the correct left and right pieces. This is fairly easy, as the two incorrect pieces are way too big for the bottom piece. Once you have the three right pieces you need to rotate them to fit in a way that shows one complete brain scan with no overlaps. Your placement does not register until you set the piece down, if you are holding the piece it won’t lock in, even if you have the rotation right.
As you can see in the solution above, the brain scan fits perfectly, showing a massive dark spot in the middle which is a brain tumor.
Save $50 On This Transformers Limited-Edition 6-Movie Box Set
Transformers movies might not be Oscar-contenders, but when it comes to summer blockbusters and watching millions of dollars of pixels clobber each other, this series is hard to beat. If you’re a fan of the franchise, you can grab the limited-edition steelbook collection of six high-octane action movies for only $85 at Amazon right now. This collection released last year with a retail price of $135, so this is quite the offer. As with most Amazon deals, there’s no telling when this offer will disappear.
The only downside is that it doesn’t come with last year’s entry in the franchise, Rise of the Beasts. But if you want to complete your Transformers steelbook collection, you can snag Rise of the Beasts for $38–which admittedly sounds very pricey in comparison to the collection. It is worth noting that the $85 price for the six-movie collection is the lowest since Black Friday, when it was on sale for $80. Since then, the collection has remained around $110.
$85 (was $135)
This Transformers collection bundles six films–Transformers, Revenge of the Fallen, Dark of the Moon, Age of Extinction, The Last Knight, and Bumblebee–together into one gigantic collection. Each film is housed inside of a unique steelbook, and each case has artwork of key players in the saga, like Optimus Prime, Bumblebee, and Megatron.
As you’d expect, there’s more than meets the eye with these films. On the surface, you’re getting both 4K UHD and 1080p Blu-ray copies of each film, as well as plenty of behind-the-scenes extras that reveals how each movie was made. The total runtime of all six movies is over 14 hours, which equals a lot of explosions from Michael Bay, the master of Bayhem. As an added bonus, each film is also available to watch online, as digital codes for the movies are included.
Best Buy also still has the this Transformers collection in stock, but it’s selling for the full list price of $135.
You Can Upgrade Your Steam Deck Or ROG Ally’s Internal Storage To 1TB For Only $70 Right Now
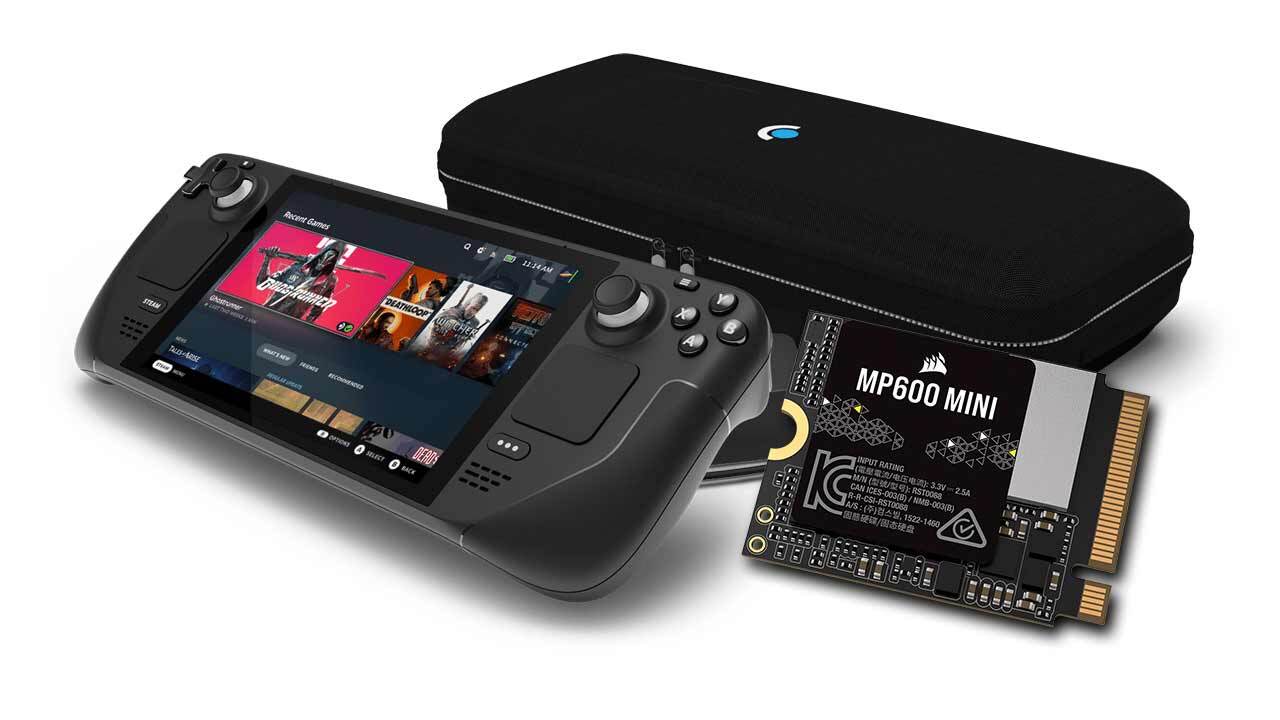
Expanding the storage capacity on your devices, especially if you wanted an SSD, used to be an expensive endeavor, but over the last few years, prices have come down dramatically. If you’re a Steam Deck owner who doesn’t have the 1TB OLED model or an Asus ROG Ally owner–both models of the ROG Ally come with 512GB–you’ll want to check out Amazon’s current deal on the Corsair MP600 Mini NVMe SSD. For just $70, you can get a 1TB SSD that’s fully compatible with either handheld.
With a list price of $110, this MP600 Mini deal is pretty great. Before this offer, $85 was a really solid price. For owners of the 64GB Steam Deck, this will be a massive upgrade, enough to store not only plenty of indie games but also a bunch of those big AAA releases that rapidly eat away at storage space.
It’s a relatively simple process, as you can simply insert the drive into the open M.2 2230 slot. Owners of the 256GB and 512GB Steam Decks can also take advantage of this expansion, although it’s worth noting that this will require you to remove the storage drive that’s already installed on the system. You’ll also have to install SteamOS on the new drive. But for extra space ahead of Q4’s upcoming list of big-name games? It’s worth considering.
If you’re upgrading your ROG Ally from 512GB to 1TB–which will double your storage space–you’ll want to reinstall Windows. Luckily, Asus has a walkthrough for upgrading your SSD that should come in handy if you’ve never done this type of upgrade before.
Speaking of the ROG Ally, if you’ve been considering picking up Asus’ handheld gaming PC, now’s a pretty great time to buy one at Best Buy. The base model ROG Ally is on sale for $400 (was $600), while the “Extreme” iteration is 100 bucks off at $600. These prices match the lowest yet for the handheld.
This SSD is also compatible with Microsoft Surface and other ultra-thin devices, so if you’ve been looking to enhance those machines, this is an affordable upgrade.
Keep in mind you can also upgrade your storage on both the Steam Deck and ROG Ally with microSD cards. Over at Amazon, you can grab a high-end 256GB Samsung microSD card for $18 and a 512GB for $57. If you prefer SanDisk, you can get a high-end 256GB card for around $27 and a 512GB card for roughly $44..